Stocktake Excelerator
Introduction
Stocktake Excelerator is a tool that enables users to perform and manage stock takes using Excel. It comes with several useful features, including:
- Create and edit stock take lists.
- Download existing stock take lists and enter actual values.
- Browse Sage data and select items to enter on the sheet.
- Create profiles for selecting bins or products to reuse in future stock takes.
This guide explains how to use the Stocktake Excelerator, including setup, templates, and common workflows.
Setup
To get started with Stocktake Excelerator, follow these steps:
1. General Excelerator Setup
Begin by completing the general Excelerator setup as described in the Getting Started guide. This includes installing the Excelerator add-in and configuring your connection to Sage 200.
2. Licensing
Ensure that your Stocktake Excelerator module is licensed. Licensing details and activation steps can be found in the Licensing section. Without a valid license, the module will not be available for use.
3. Enabling Permissions in Sage
Verify that your Sage 200 user account has the necessary permissions enabled:
- Stocktake Enter Values (Web Portal)
- Manage Stocktake
- Stock list
These permissions are required to access and manage stocktake data through the Excelerator.
See also: Sage 200 Configuration
4. Accessing Stocktake Excelerator in Excel
Once setup and licensing are complete, open Excel. You will find the Stocktake Excelerator options on the Excel ribbon, typically under the "Excelerator" tab. From here, you can launch the Stocktake features, create new lists, and manage your stock take data.
For more details on setup and troubleshooting, see Getting Started.
Standard Templates
Templates are working examples of Excel worksheets for use with Excelerator. You can use the standard templates as they are, amend them using the Template Designer, or create your own templates from scratch.
Codis provides a single template workbook S200StocktakeTemplate.xlsx.
The S200StocktakeTemplate.xlsx includes a sheet which allows:
- Single - Entry of a single Stocktake list.
Options
Don't Clear Header Ranges?
This option controls whether single-cell ranges (those generally at the head of the spreadsheet) will be cleared when the Clear button is clicked.
Creating and entering values in Stocktake list(s)
Creating new Stocktake list
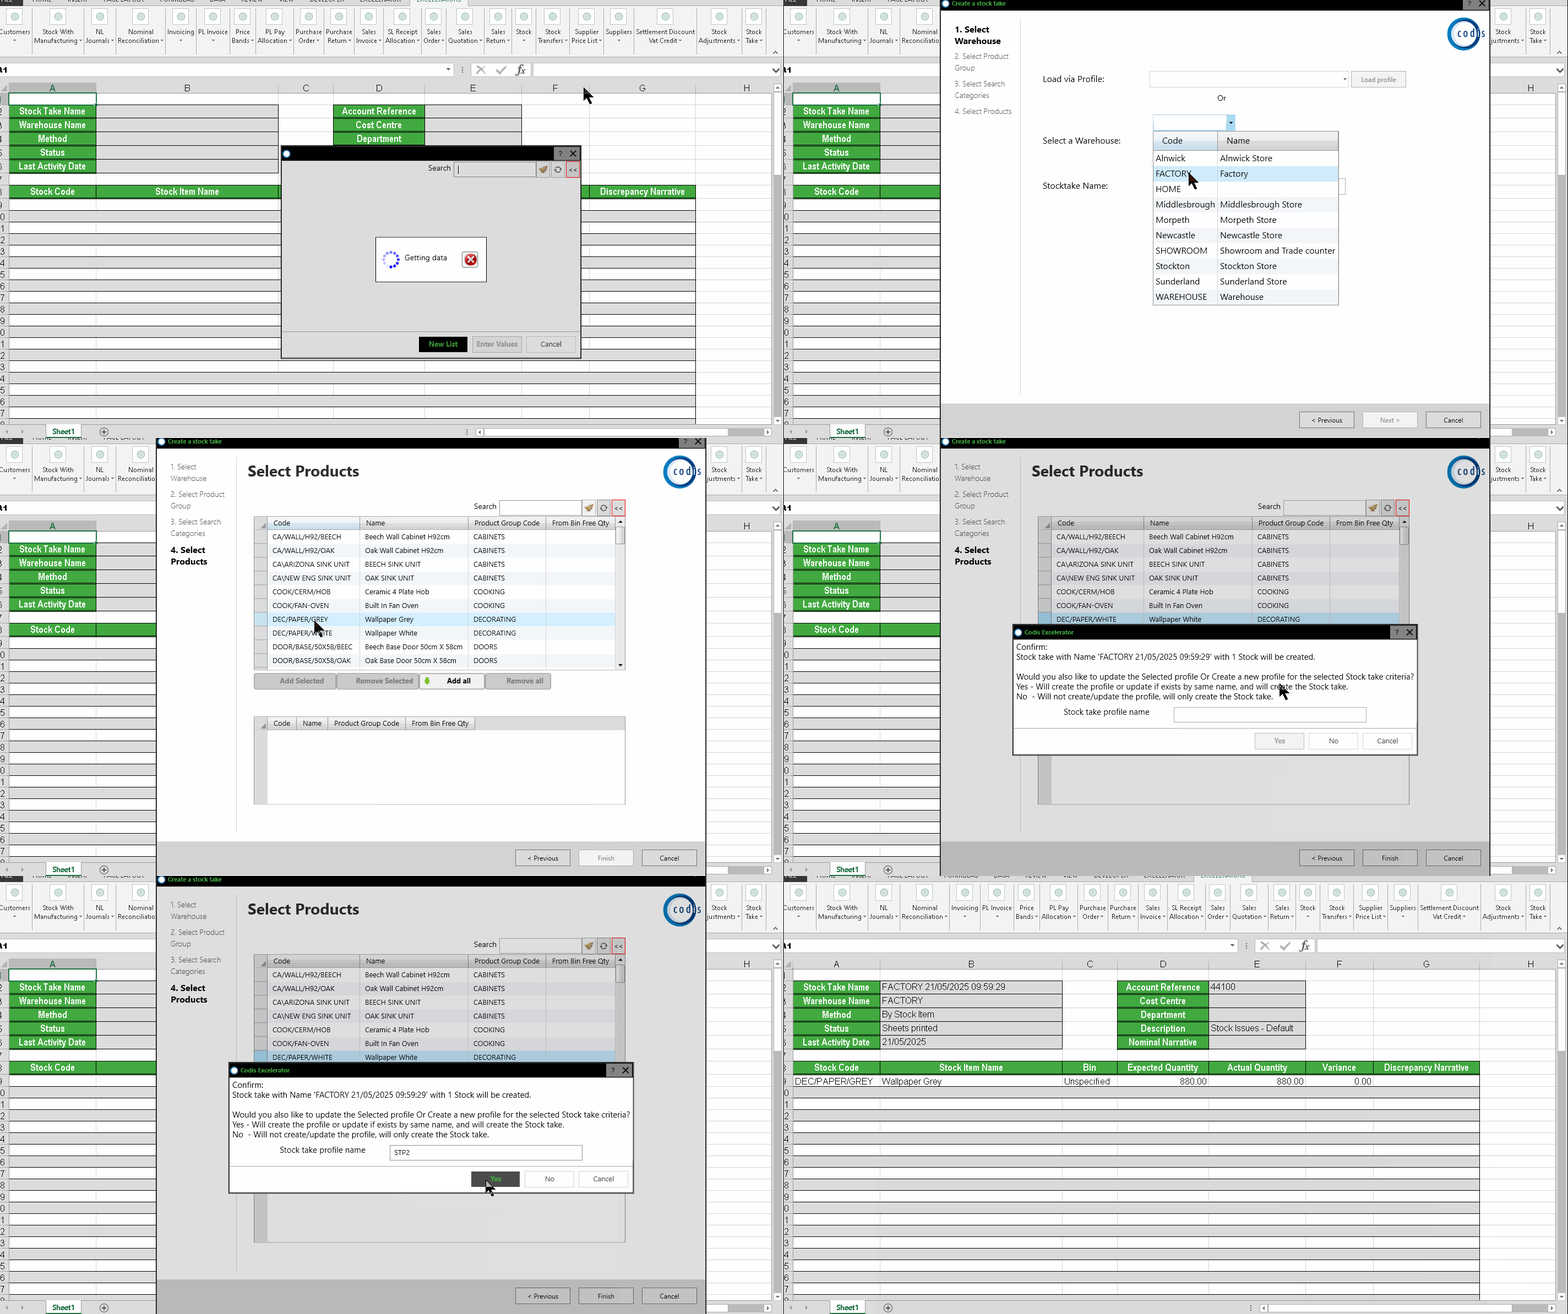
The screenshot below shows how to create a new Stocktake list with a new profile.

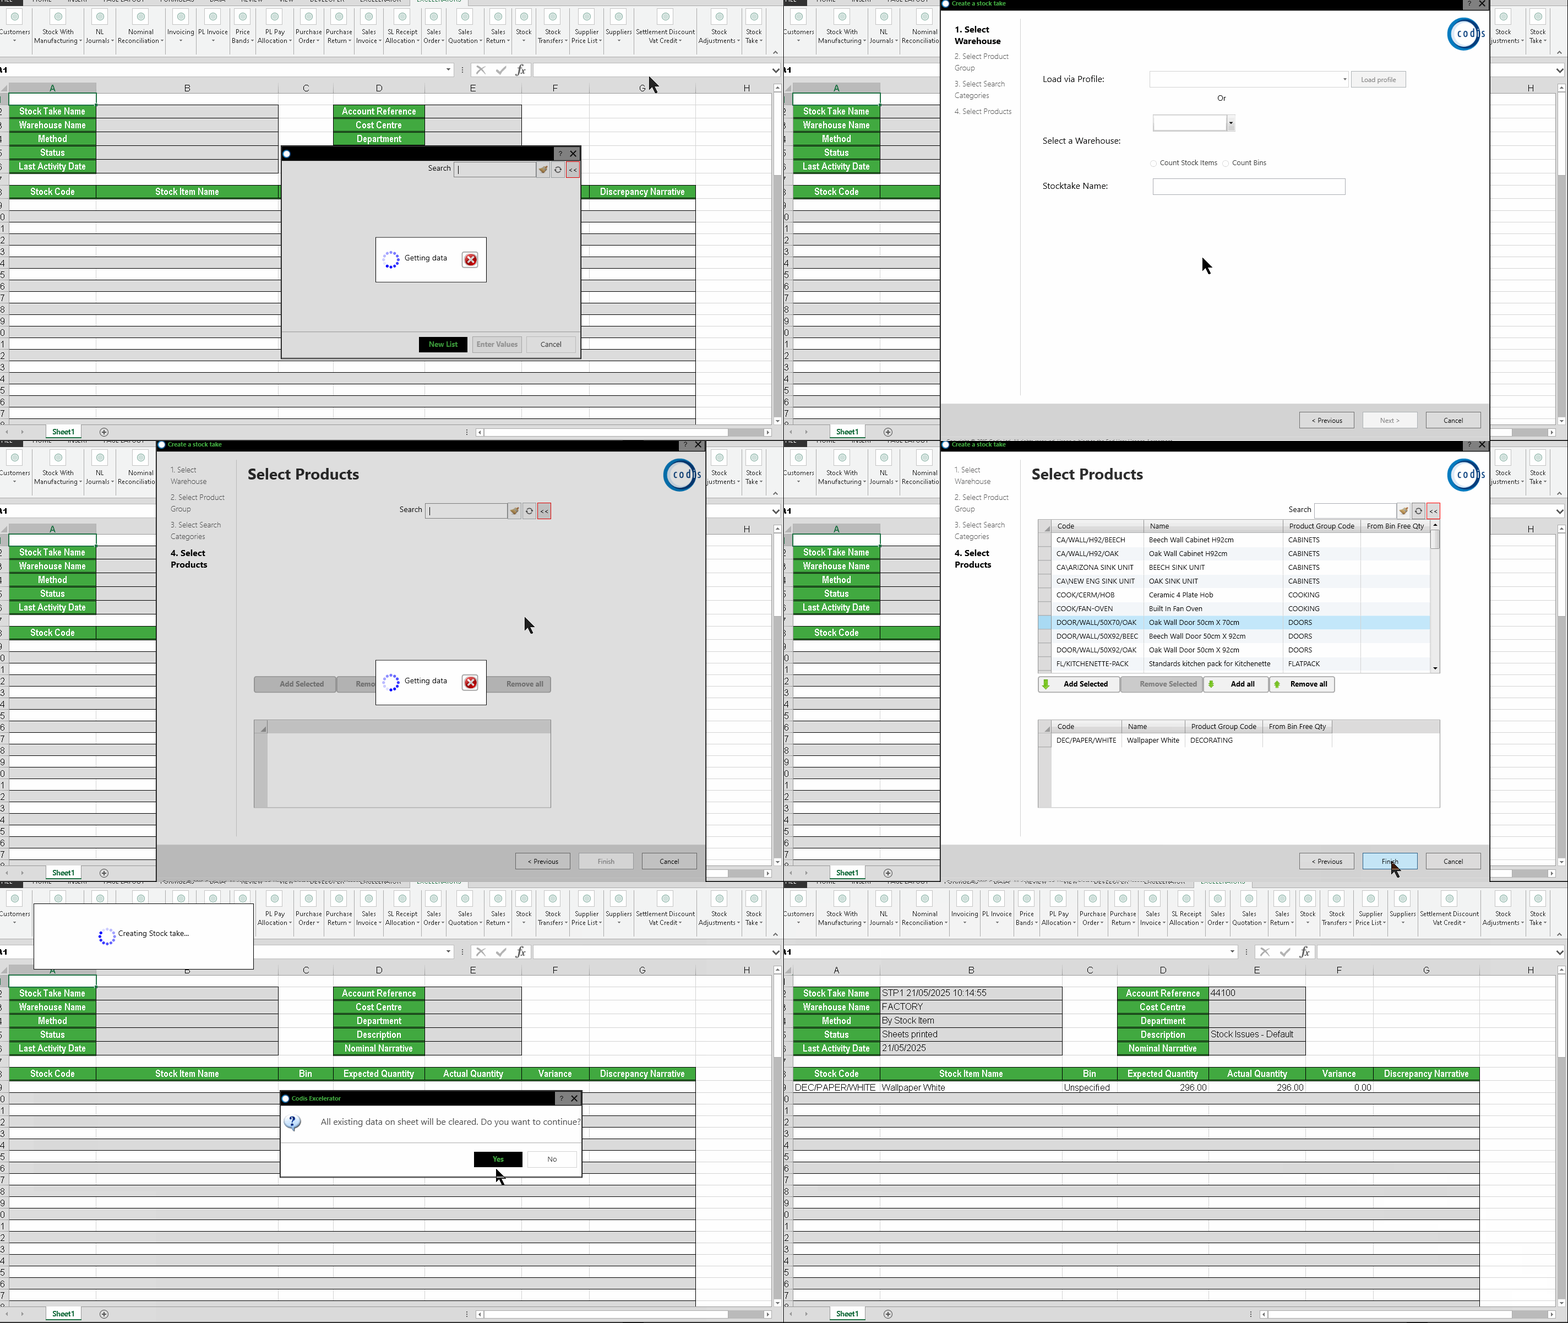
The screenshot below shows how to create a new Stocktake list by loading an existing profile.

Amend existing Stocktake List
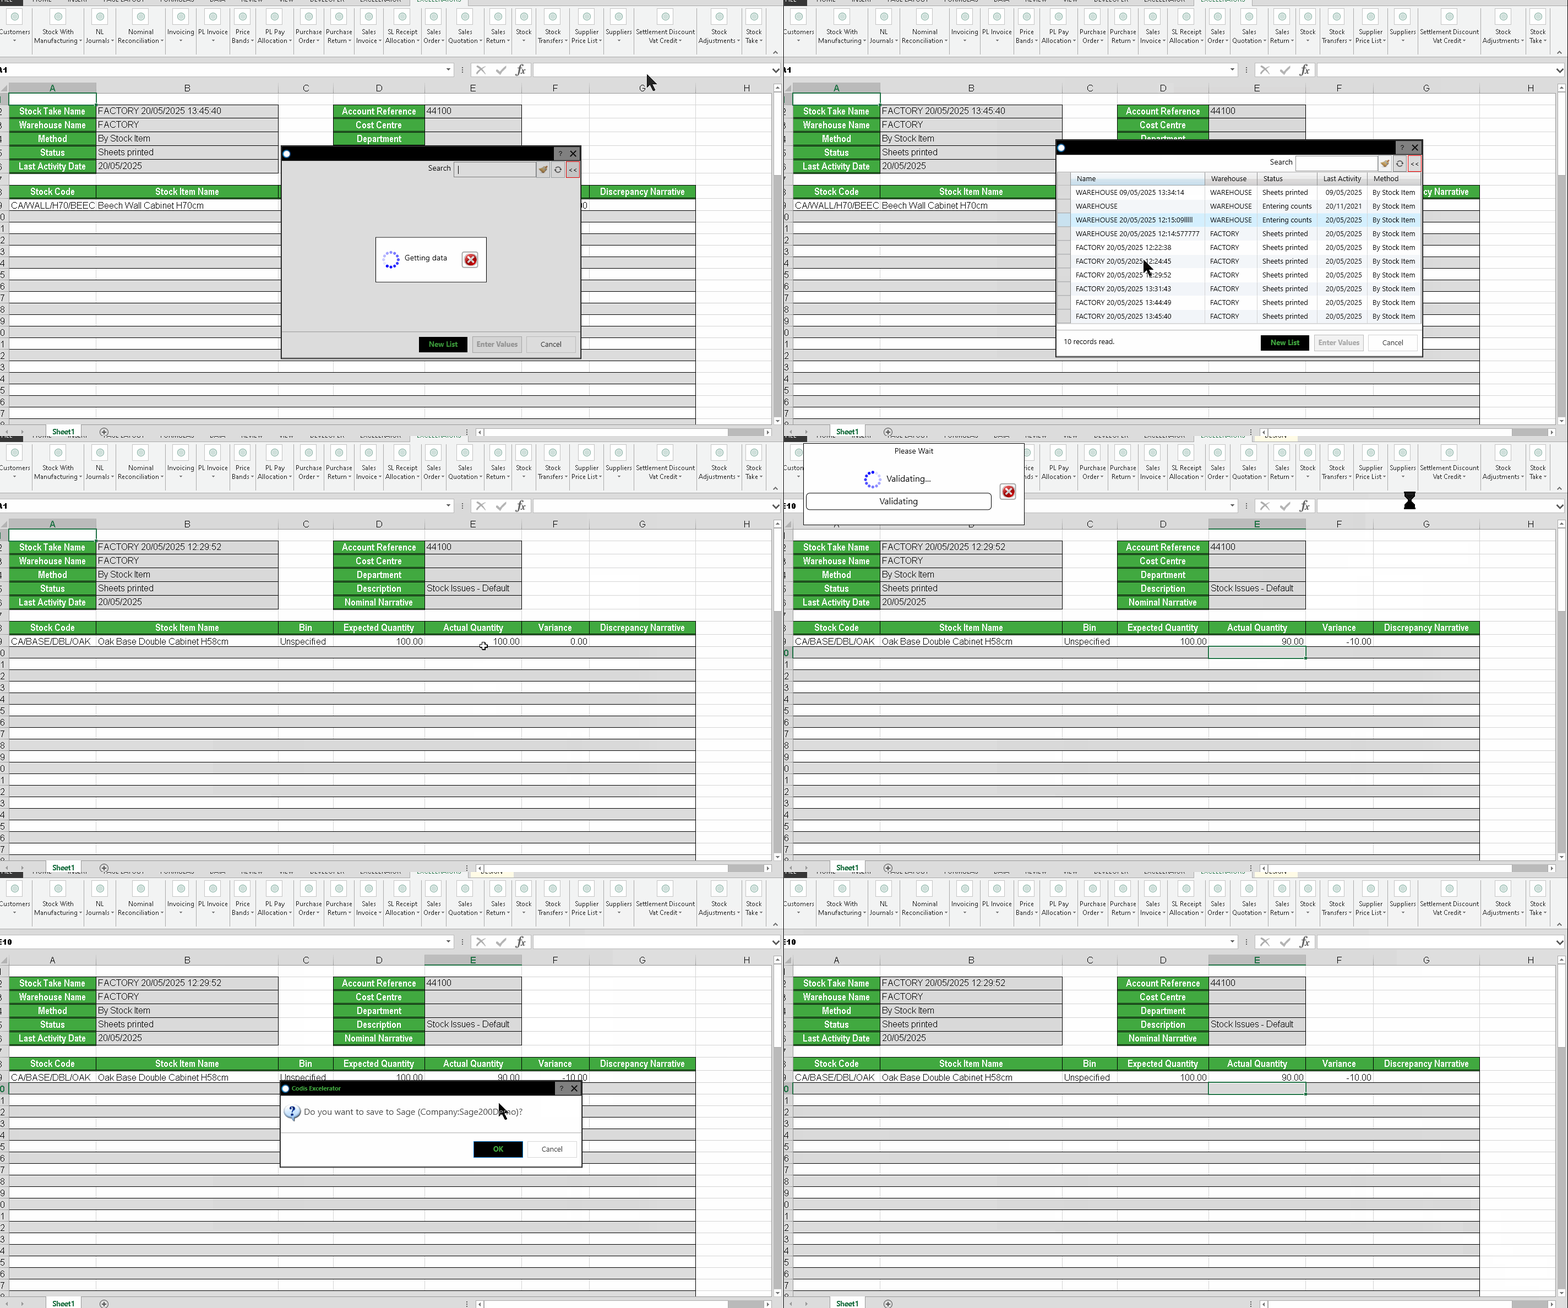
The screenshot below shows how to amend an existing Stocktake list.

Browses
Like other Excelerators, Stocktake Excelerator allows you to browse and download Sage data.
You can browse by Account Reference. After selecting a nominal code, the Cost Centre and Department fields are populated automatically.
Download
You can download a Stocktake list in order to enter actual stocktake values directly into Excel. This allows you to update and record the physical stock counts efficiently before uploading the results back to Sage.
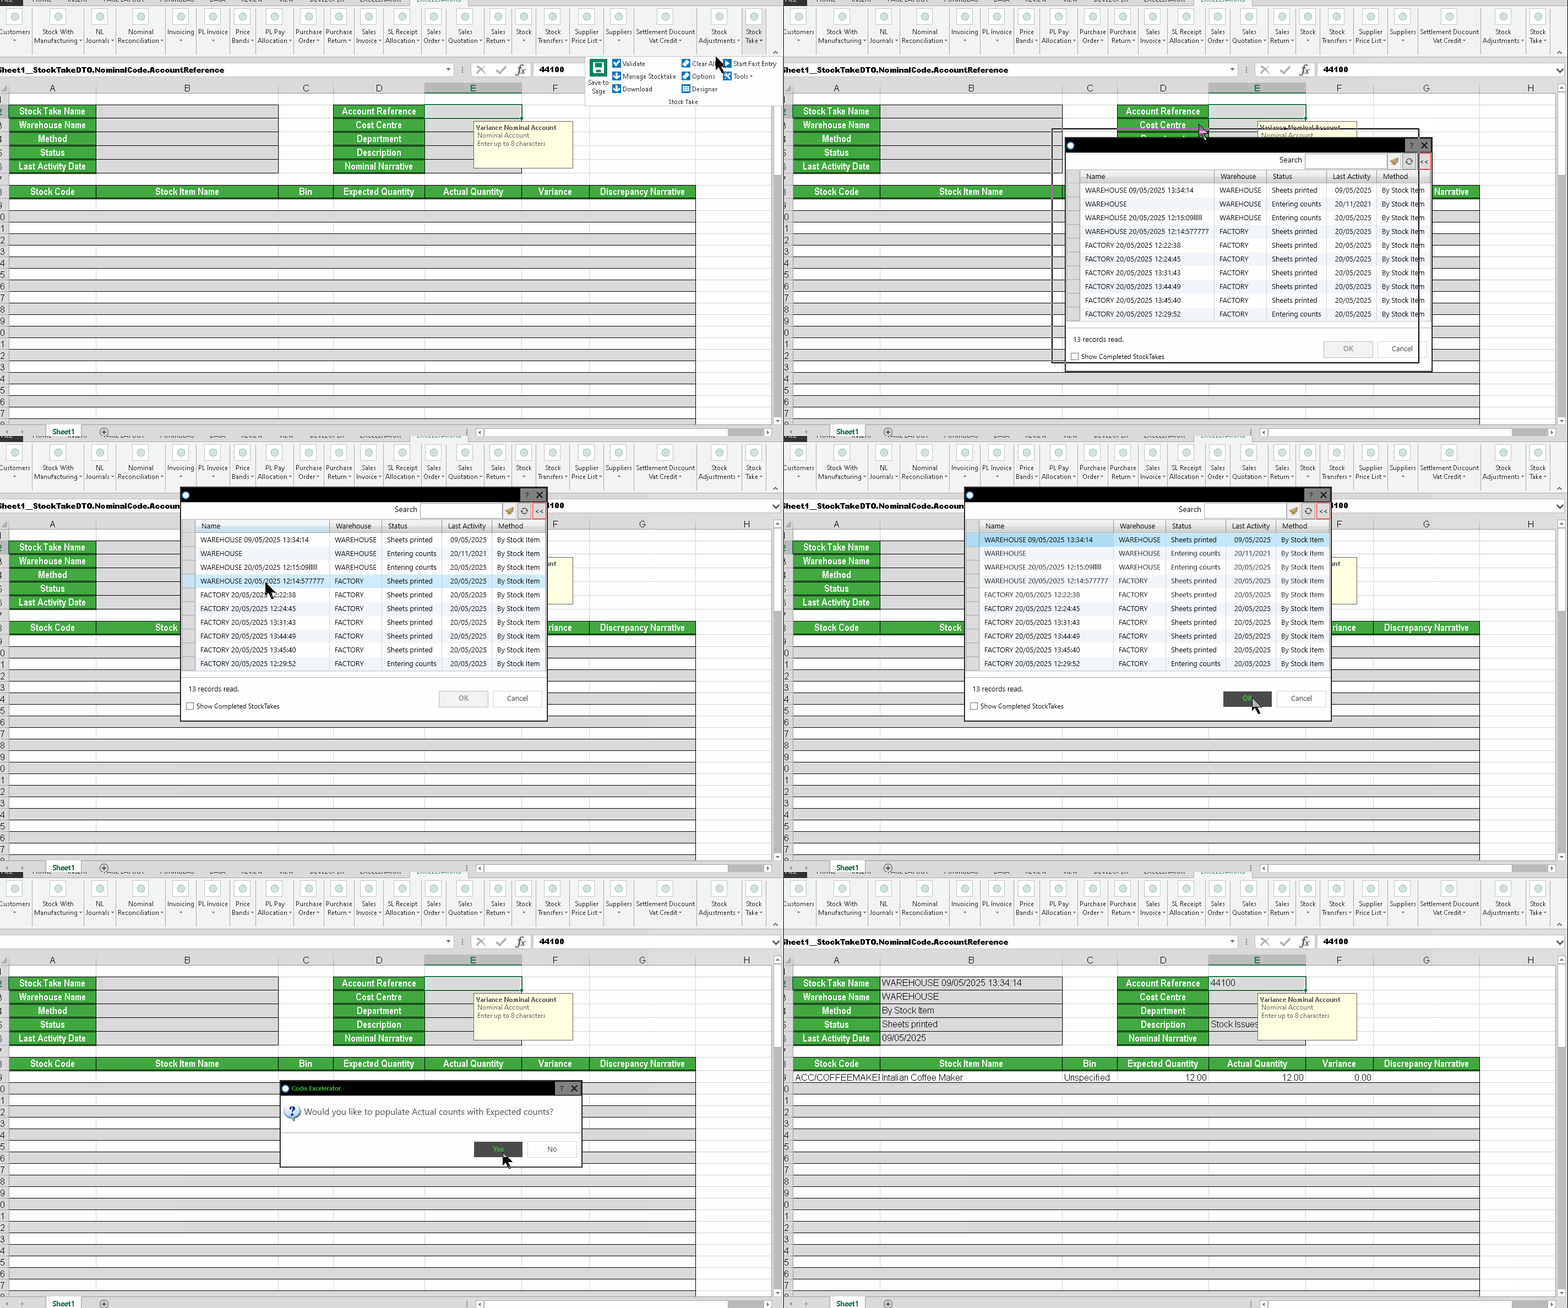
The screenshot below shows how to download a Stocktake list.

Clear All
This menu option will clear down the data in the Excelerator ranges.
See also: Clear Excel Data.
Workflow
The typical workflow for using Stocktake Excelerator is as follows:
-
Create or Download a Stocktake List
Start by creating a new stocktake list or downloading an existing one from Sage into Excel. -
Enter Actual Stocktake Values
Enter the physical stock counts directly into the downloaded or newly created list in Excel. -
Validate Data
Use the Excelerator validation features to check for errors or missing information before saving. -
Amend as Needed
If necessary, amend the stock take list by editing values or adding/removing items. -
Save and Upload to Sage
Once all values are correct and validated, save and upload the stock take results back to Sage 200. -
Clear Data (Optional)
Use the "Clear All" option to clear the worksheet ranges and prepare for a new stock take process.
This workflow helps ensure that your stock take process is accurate, efficient, and fully integrated with Sage 200.
Stocktake Profiles
Stocktake Excelerator includes an advanced product selection wizard that allows users to specify selection criteria—such as warehouse, product groups, search categories, or bins—before browsing and selecting stock items that meet those criteria. For Stock Adjustments, additional background criteria ensure that stock items currently held on another stock take are excluded.
Selection criteria can be saved as reusable profiles, each with an ID and description. The supported criteria for profiles are:
- Warehouse
- Product Groups and search categories
or - Warehouse
- Bins
Profiles are stored in a user-selectable folder, allowing them to be shared across users or systems. Users can recall and apply saved profiles when performing stock takes or adjustments.
Profiles may also store the actual selected product codes and bins. Since the underlying stock data may change (for example, products or bins being added or removed), the system checks the validity of the selected items when a profile is used and alerts the user if the list is no longer valid or complete.