Troubleshooting
If your issues aren’t addressed in this help guide, please call our support team on +44 (0)20 88 610 610 or email support@codis.co.uk.
Supported hours are 09:00-17:30 GMT Monday to Friday.
Installation
The following are some common issues encountered during the Installation.
1. User Installations are not allowed
The following message gets displayed during Installation:-
"The system administrator has set policies to prevent this installation." (MSI install)
"This installation is forbidden by system policy" (exe installation)
The following message is found in the log: "Machine policy value 'DisableMsi' is 1"
This means that the system administrator has disabled User installations. There are two possible solutions:
- Make the user part of the administrators' group to run the installer as an administrator.
- Do not run as administrator. If the user does not have administrator rights as the Installation will appear successful, but it will install to the administrator user location.
- An administrator makes an administrative installation (see below) then the user installs from this.
2. This Installation is forbidden by system policy. Contact your system administrator.
Check Computer Configuration > Administrative Templates > Windows Components > Windows Installer for a DisableMSI setting. There might not even be a Windows Installer subkey.
Run gpedit and check settings in Computer Configuration->Administrative Templates->Windows Components->Windows Installer
This may work without the reboot
- Click Start -> Control Panel
- Open Administrative Tools
- Open Local Security Settings
- Click Software Restriction Policies
- If no software restrictions are defined, right-click the Software Restriction Policies node and select New Software Restriction Policy
- Double click Enforcement
- Select "All users except local administrators".
- Click OK
- Reboot the machine
3. Installation appears to be successful, but the toolbar does not appear
This is because the add-in did not register. Check the adxregistrator.log (see above). It might indicate that the update to the registry was not successful and which key(s) failed to update. Usually, the problem is permissions. Check the registry HKEY_CURRENT_USER\Software\Microsoft\Office\Excel\Addins. There should be an entry for the product, e.g. Codis_Excelerator_Sage200_SharedAddin.AddinModule.
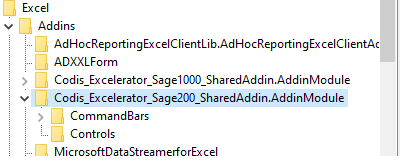
This should have entries as shown below - product subkey (e.g. Codis_Excelerator_Sage200_SharedAddin.AddinModule), :
If the entry for the product or the entries is missing, then it will probably be due to permissions on the registry. Sometimes the Add-in registry has special permissions that allow the product entry to be created but does not assign write permissions to the product subkey, so the sub keys and the entries shown above are not created.
This video shows an example of permissions that prevent Excelerator from registering properly and how changing the permissions allows it to register. Remember that the restrictive permissions might result from a deliberate attempt to prevent office Add-ins from being installed. On the other hand, it may result from a group policy, but we've not been able to recreate it yet.
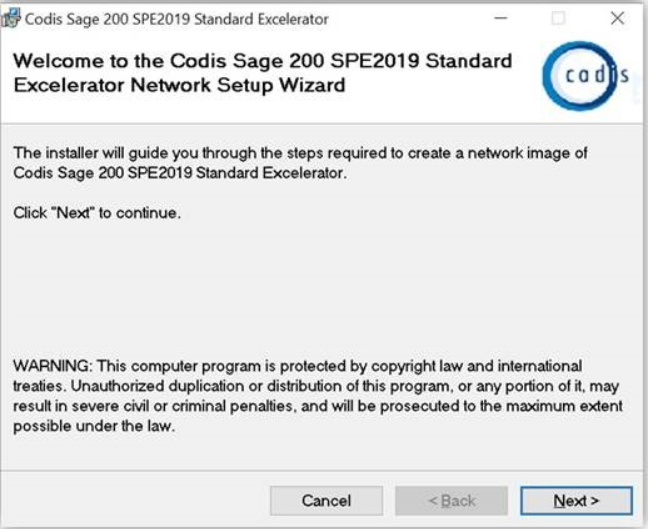
4. Msi Admin extract for restricted Users
An administrative install command extracts an installation image in a folder (typically a shared network folder). Users can then install the software from their profiles by double clicking the MSI created by this command.
-
Run command prompt as administrator
-
Type msiexec /a
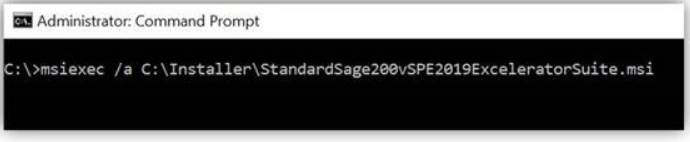
Command for Silent/Quite Install with install log: - msiexec /a
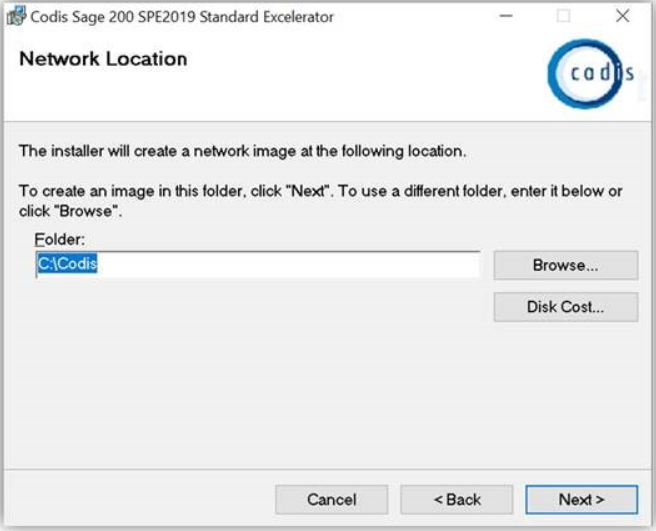
Note: The destination Path should not be the same as Source Path.
3. Click on 'Next'.
- Select the folder to extract, and it should be a shared network folder that the users who need to install the software can access.
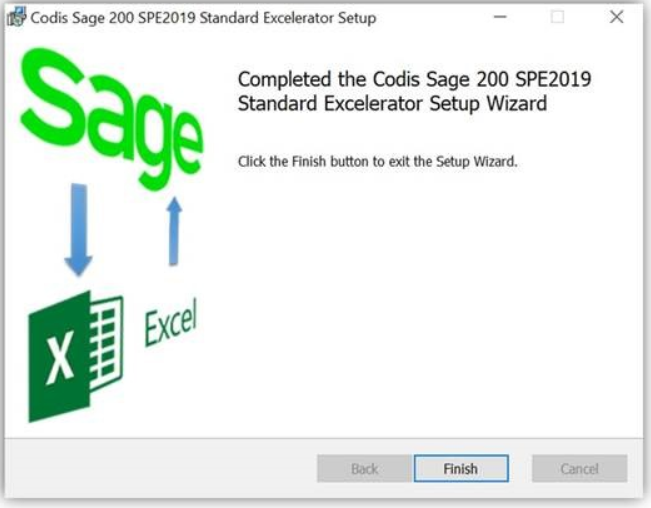
Click on 'Next'
- Click on 'Finish'.
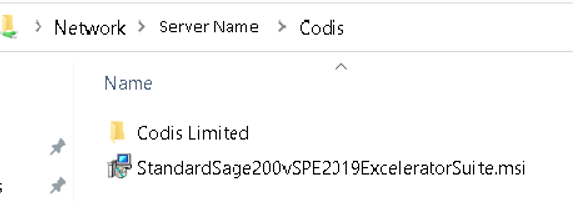
- The user should double-click on this new MSI to install the software from the network folder.
For example, \\
The Installation should no longer be stopped due to "User installation not being allowed". A UAC prompt may be displayed for administrator credentials, but it would not install to the administrator's profile.
Users may keep or discard/delete the Codis Limited folder created in this shared folder as it is not required.
Please proceed with the licencing process if the Installation is successful.
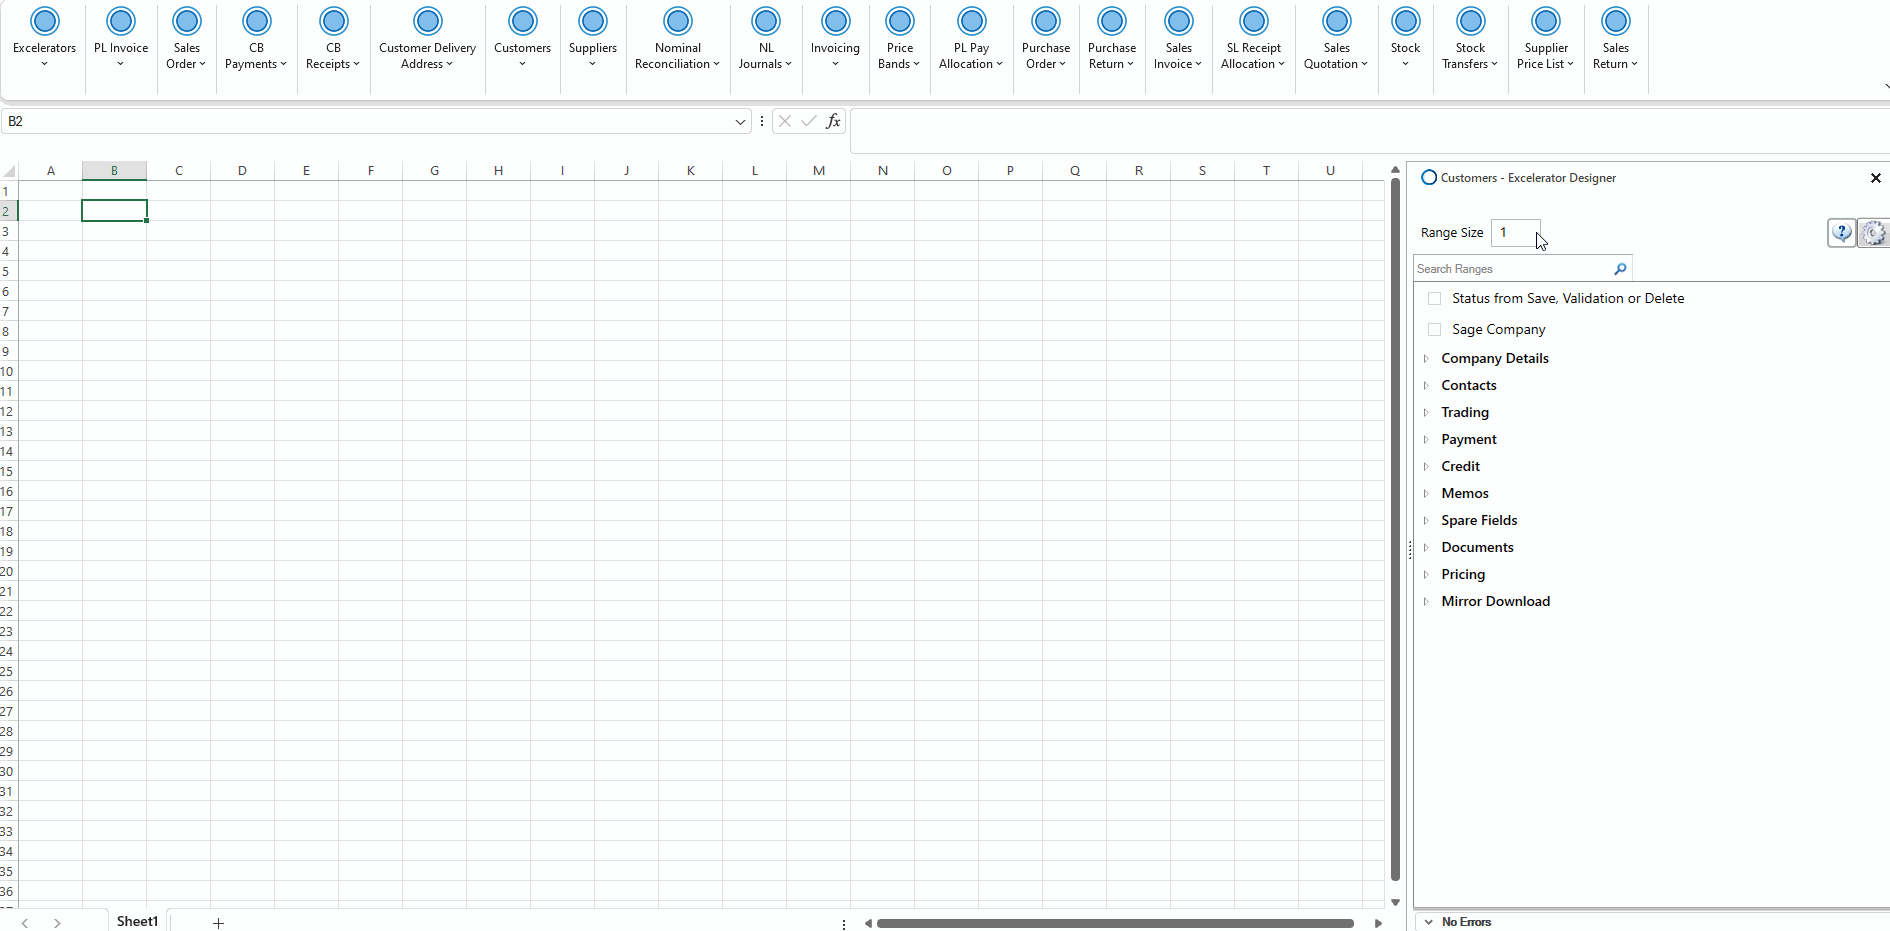
5. Excelerator Menu bar does not appear
- You may be logged in as a different user from the installation user.If you logged in with your profile, it is still worth following these instructions.
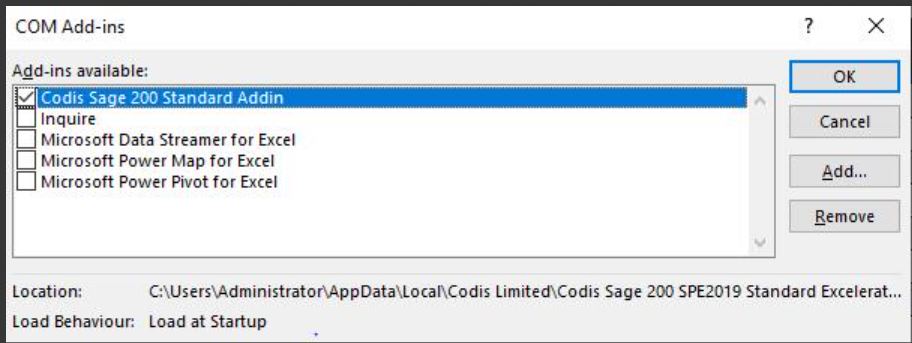
- Click on File Menu in Excel -> click options -> Add-ins -> select COM Add-ins from the drop down and select go.
-
Ensure that the Sage 200 Standard Add-in is ticked as shown below.
6. Excelerator Menu stopped appearing
- Check the Disabled Items .Go back to Add-ins -> Disabled Items from the Manage drop-down, and click Go.If the add-in appears in the list, select it and click Enable.
- Check if any background instances of Excel are still running. Open Task Manager, end all excel processes and relaunch Excel.
7. Manually Registration of COM DLLs
Run a command shell. (Click Start, then Run, enter cmd, and click OK). This will display a window where the user can enter commands.
Change directory to the directory which holds the dll, using the cd command.
   cd <directory name><return>

   eg. cd c:\Program Files\Codis Excelerator\NL Journal Excelerator                  <return>
Register the dll file using the regsvr32 command e.g.
regsvr32 nlExcelerator.dll <return>
8. Manage the Add-ins in Excel
Run MS Excel as Administrator
From MS Excel, access the Excel Add-in Manager.
Choose Add-ins – Manage select COM Add-Ins.
If Excelerator appears on the list but is not ticked – Tick the box to enable Codis Excelerator.
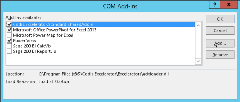
If Excelerator does not appear on the list – click Add
Browse and locate the file adxloader.dll (adxloader64.dll for MS Office 64)
For Standard Installation, it would be in either C:\Program Files\Codis Excelerator\Excelerators OR C:\Program Files (x86)\Codis Excelerator\Excelerators
Select adxloader.DLL (adxloader64.DLL for MS Office 64) and add.
9. Error accessing Add-in menu options
If the following error is displayed when accessing a menu option, then follow the instructions below to resolve it.
This may be due to insufficient rights on
"HKEY_CURRENT_USER\Software\Microsoft\Office\Excel\AddIns\ADXXLForm" registry node.
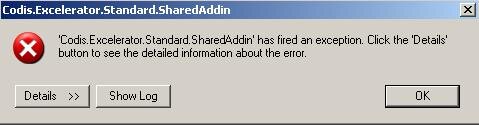
Clicking on Details shows the error detail:
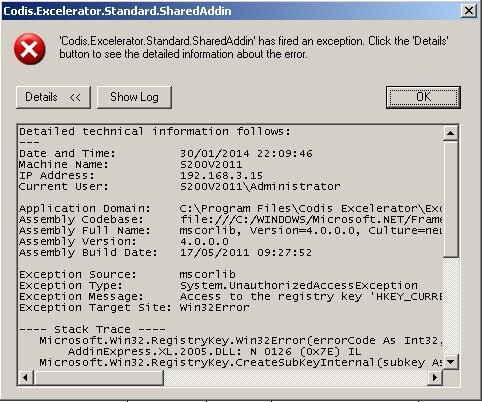
Clicking on Show Log outputs the error to Notepad. The log file can be saved locally by selecting Save As and emailed to Codis Support if requested.
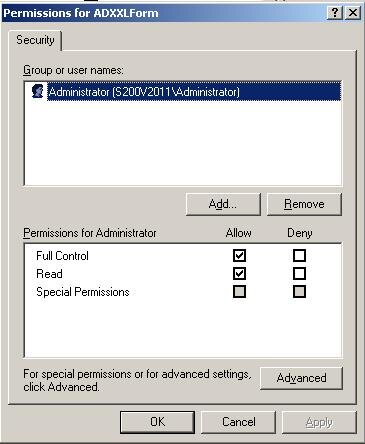
Check that the user has sufficient privileges to access the Add-ins by following these steps:
Run Regedit (Start>Run)
Expand HKEY_CURRENT_USER
Software > Microsoft > Office > Excel > AddIns Right click on ADXXLForm

Select Permissions
Ensure Full Control, Read and Special Permissions are ticked
Select Apply and then click OK
Uninstall
Please close all the open Excel windows and uninstall Excelerator from your PC by accessing Control Panel > Programs > Programs and Features
Select the Excelerator in the list, right-click and choose “Uninstall”.

If you get an error message while uninstalling, contact your IT department.
Licensing
1. Licence expired
If the Codis Excelerator licence has expired, please contact your Sage Business Partner or Codis Licensing (licensing@codis.co.uk).
2. Product not licensed
If "The Product is not licensed" is displayed.
- Open Excel > Excelerator > Licences > Advance > Register
- Register Now > Next > Enter First Name and Last Name > Advanced > Tick the 'If this product is installed on a Terminal/Citrix server' box > Next.
- Log in with either the Office 365 or Google account. Enter the registered email and password. Close the web browser. Refresh the licence
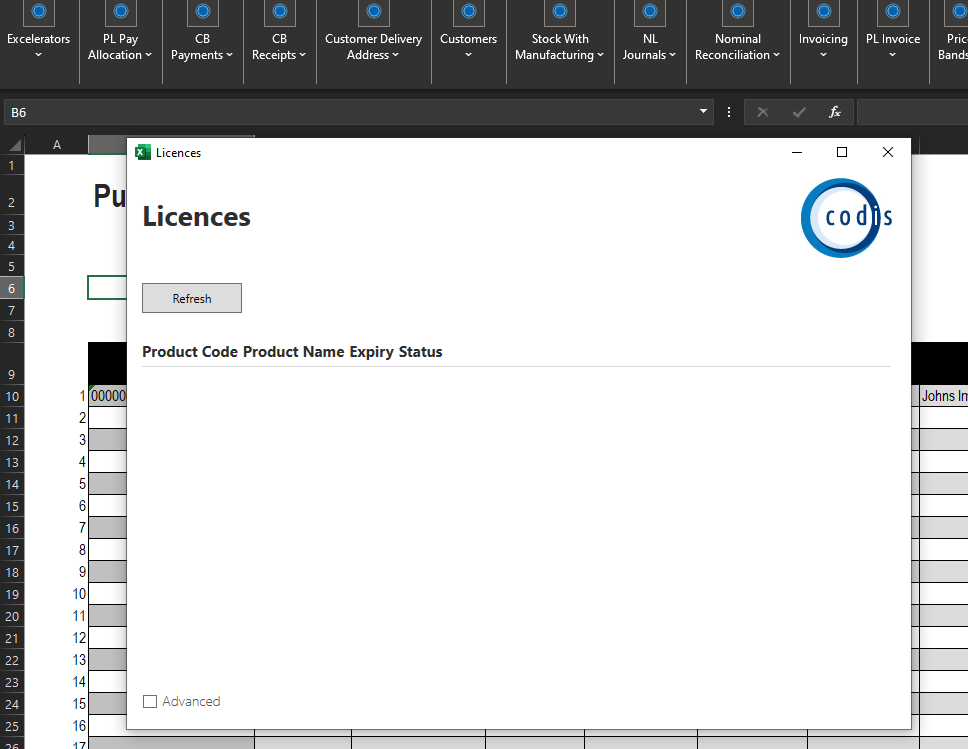
3. No Products are Shown after Clicking on Licences.
If a screen like the one below is displayed, please use the "Select Modules" feature and click OK to access the licences. The product list should then be refreshed.
Upgrades
There are occasions when the version of Excelerator that the user currently uses will need to be upgraded. This is usually due to enhanced functionality or reported bugs that have been fixed.
We will inform the user when this is required, and the user may need to download the latest installer.
Once users have downloaded the latest version, please follow these Installation steps to install the Excelerator.
Logs
Logging
In most cases, the logs detailed on this page will only be inspected by Codis support.
There are two types of logs. Logs that are updated during the installation and logs that are updated when the software attempts to run.
Installation Logs
Logs can provide helpful information in the event of an installation failing. There are 2 logs that can be updated in a complete Excelerator installation.
-
Installer log
-
ADX Registrator Log
Installer Log
This is created by the installation MSI or EXE. The EXE install always create a log and provides a link to it. The MSI install has to be told to create the log.
EXE Installation
The exe installation is logged by default, and a link to the log is shown at the end of the installation. The log files are created in the %TEMP% folder. Two files are created - one for the bundle and one for the package within the bundle. Both are named after the installer e.g. "Codis Sage 1000 Release Standard Excelerator_20191207101256_000_ExceleratorSetup.log". The package one (with "ExceleratorSetup") in its name is likely to contain the diagnostic information needed.
EXE Installations are no longer supported.
MSI Installation
Run the command:
msiexec /l\*v "LogFile.log" /i <Msi name>
ADX Registrator Log
This is created in the %TEMP%\<Product Name Tag> folder.
The product name tag could be e.g. "Codis_Excelerator_Sage200_SharedAddin"
Runtime Logs
These logs are updated every time the Excelerator attempts to load (although the registration has to be successful for this to happen).
Adxloader log
This is also created in the %TEMP%\<Product Name Tag> folder. It records the Addin express addin attempt to load.
adxloader.log does not always seem to be populated.
Excelerator Log
This log can be found in %userprofile%\AppData\Roaming\Codis\Excelerator
The Excelerator program updates this log once the add-in loads the program. Its output is in XML format and can be viewed using the Log Viewer option in Excelerator.
Info
The level of logging and output format are configured in the log4net.config file found in the Excelerator installation folder.
The logging level is configured in the level tag in the log4net section. This should be set to ERROR. Changing this to INFO or DEBUG will increase the amount of information sent to the log.
If set to the INFO logging level, this log contains details about transactions that have taken place, such as when a Sales Order is created. All save, deletions, and prints will be logged.
If set to the DEBUG logging level, the log will contain detailed internal messages about processing. Normally, you should only set the logging level to DEBUG when Codis support has told you to do so. If left at logging level DEBUG, the log file will grow rapidly. You should try to make sure that after any diagnostics are completed, the log level is reset to INFO or ERROR to avoid a large file being created.
Info
If the Excelerator log is updated when Excel starts, it shows that the add-in has successfully loaded the Excelerator program.
The Log Viewer program is available in the installation folder as a stand-alone program.
Error Messages
Text data found that is too big for the property for range
This error will only occur if you have the Add Length Validation option set and you have a range with data exceeding the maximum text length allowed for the Sage field.
If you click to show the details, the Data section will show the full text and the maximum length.
Browse Troubleshooting
Browse Option Does Not Appear on Context Menu
Have you logged into Excelerator?
The browse will not appear until you Logged into Sage 200.
Have you selected a cell in an Excelerator range that can be browsed?
Browse is context-sensitive - it displays data relevant to the Excelerator range. If you haven't selected an Excel cell in an Excelerator range, or that range is for data that is not browseable, then the browse options will not appear.
The Browse Marker is not added
If none of the above solve your issue, try clicking on the Browse button in the ribbon. If you get an error "No browse markers found", then you need to add a browse marker.
Other Issues
Ribbon Buttons Are Greyed Out
Are you editing an Excel cell? Excelerator disables most ribbon buttons when Excel is in edit mode. Hitting Esc should end the edit.
Have you opened the Designer? Excelerator disables some ribbon buttons when the Designer is open.
Leading Zeros Stripped in Excelerator Ranges
In Excel, leading zeros are stripped from cells by default. This means that if you enter a number with leading zeros, such as "00123", Excel will automatically remove the zeros and display the number as "123". This behaviour is because Excel treats numbers with leading zeros as numeric values and numeric values do not have leading zeros.
If you want to preserve the leading zeros in Excel cells, you can format the cells as text before entering the values. To do this, you can select the cells, right-click, choose "Format Cells", select "Text" under the Number tab, and then click OK. This will ensure that any values you enter in those cells, including ones with leading zeros, will be treated as text, and the leading zeros will be preserved.
Setting the "Add Excel format" option before you design templates can resolve this issue. You can also reformat ranges in Excel.
To learn more about this feature, please refer to the Add Excel Format To Range section in the documentation.
This shows the issue before and after the "Add Excel Format To Range" is ticked.