Browse/Download Sage Data
Excelerator allows users to pick Sage data directly whilst still in Excel and use it in the template. This is called Browsing.
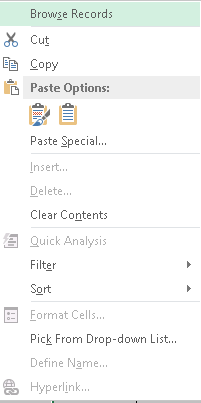
When you are entering data into your template you can simply select a cell in the range, right click and select "Browse", then pick from the data that is listed.
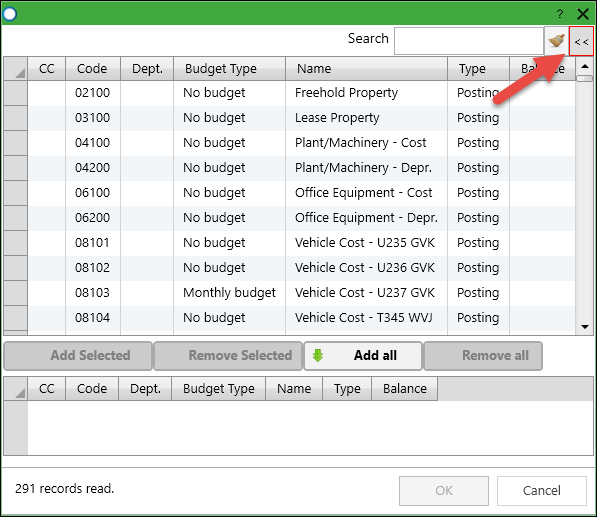
The browse allows you search and filter of Sage data. Data can easily be selected and returned to the active cell in the Excel sheet.
This is how to browse in NL Journal entry...
There are Four Ways to Access the Browse but the simplest way is to right click in a range and select "Browse" from the menu that pops up.
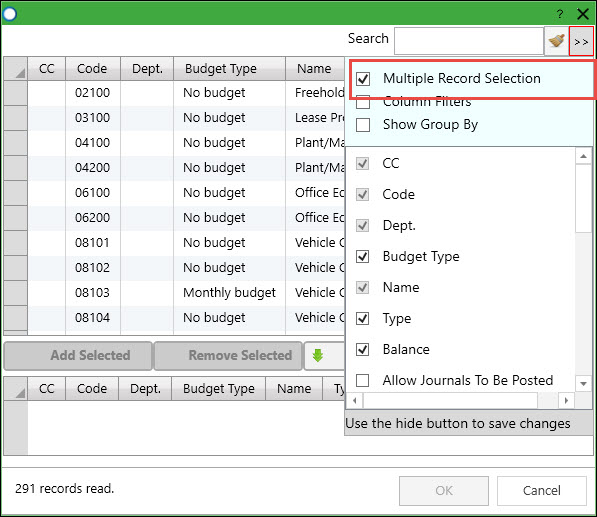
Most browses have settings accessed from this button in the top right hand corner.
For more information on the rich functionality available in our browses:
Four Ways to Access the Browse
Info
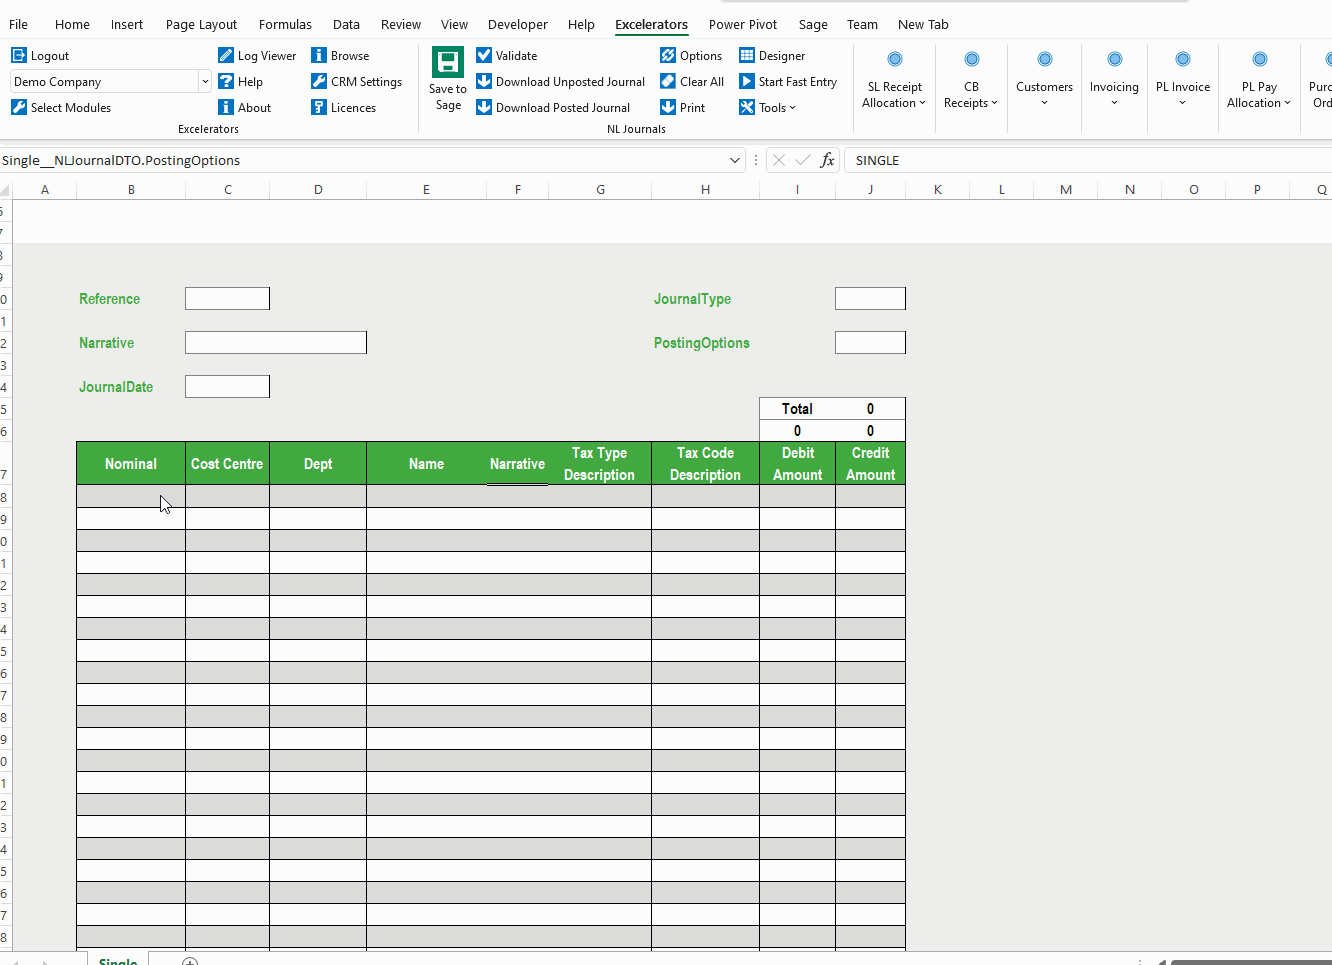
To browse Sage data, you first have to select a cell on the spreadsheet that is in an Excelerator range.
Excel right-click on a cell
Right-click to display the standard Excel menu (on ranges where selection is available).
The Browse Records option will then appear on top of the menu.
Info
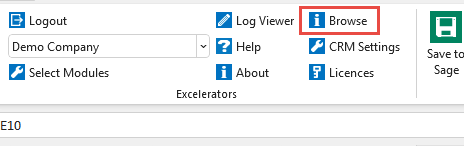
If this right-click browse option becomes disabled, then use the Browse option in the Excel Ribbon.
One of the reasons that the right-click Browse may become unavailable is that the Excelerator ranges have a different definition (for example a Table definition).
To resolve this, use the "Convert to Range" option in excel. This should make the right-click browse to be available again. Contact Codis Support for assistance if required.
'Browse' button in the Excel Ribbon
The keyboard shortcut for Browse
Using the Ctrl + F2 will also launch the browse.
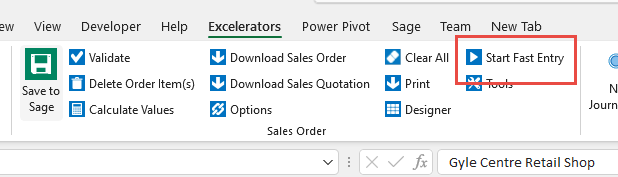
Fast Entry
Start Fast Entry by clicking on the option in the module panel from the ribbon. Note the option changes to Stop Fast Entry after starting.
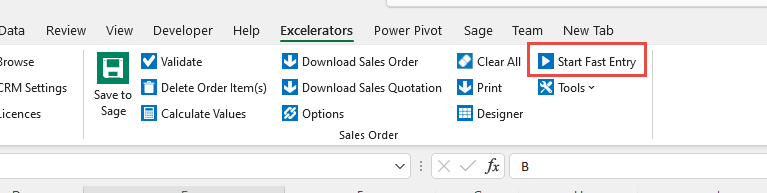
Fast Entry browse is accessed by typing data into the relevant range (cell) and tabbing off the cell.
See Fast Entry
Selecting Data From Browse
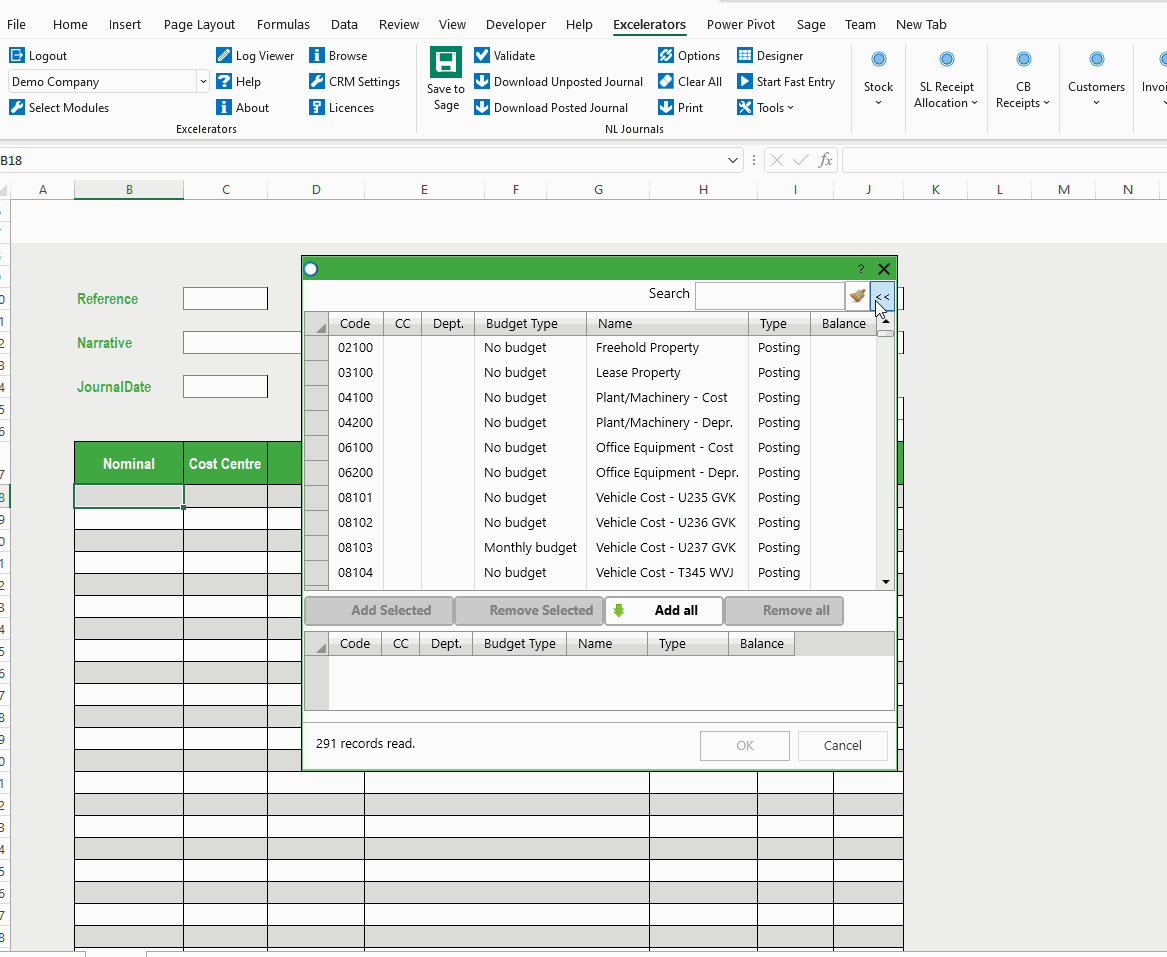
Selecting Data
Some browses allow more than one record to be selected. Where multiple records can be selected, the selection box is divided into two panels. The upper one shows a list of items available for selection, and the lower one shows the selected items.
Other browses allow only one record to be selected. Selecting single records requires fewer clicks.
Excelerator attempts to choose the correct browse - multi or single select - for you. If you browse on a single cell header range then you will always be offered a single select browse. For multiple cell ranges, some browses (like nominal codes in a journal, product codes in an order) will assume that you want to select multiple records, and others will assume that the you will want to select a single record. However, you can choose to override this in the browse settings...
This video shows how to select records in a multi-select browse...
Selecting Records More Than Once
Some multi-select browses allow records to be selected more than once. For example:
- Nominal code selection in journal entry, purchase invoice or sales invoices. The same nominal code could be used more than once.
- Product selection in Sales Order Excelerator.
Some multi-select browses remove a selected record from the top window once it is selected. For example:
- Master data Excelerators like Stock. You should not enter the same stock code more than once.
Searching and Filtering In Browse
Searching or Filtering Sage Data
The Excelerator browse is a sophisticated search engine. There are two distinct ways to search for Sage data:
You can choose what you want to do via the browse settings:
Searching all the data (Full Filter Search)
This is the default option for browse. It allows you to search all the data.
Filter the selection by entering text in the Search box.
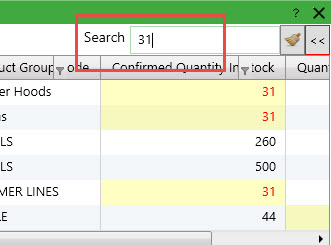
The text entered will be used to filter the data, and only those items that contain the entered text will be listed.
You can then pick individual records from those shown or click "Add All" to select all the records shown after the filter is applied.
Info
Full Filter Search is a powerful way to select Sage data to return to your Excelerator template.
In this example, the column "Report Category Description" is added to the NL Journal Nominal Code browse, and then the "accr" is used to filter on Accruals:
Filtering by Column
Filtering by Column allows you to:
- Apply more precise filtering to your searches as you specify which column of data to search in.
- Apply more than one filter on different columns
- Pick from a list of values
Watch this video to learn how to use column filters:
Field Selection and Ordering
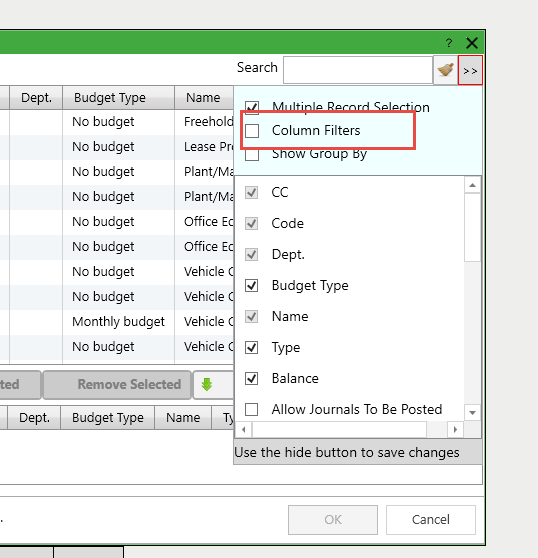
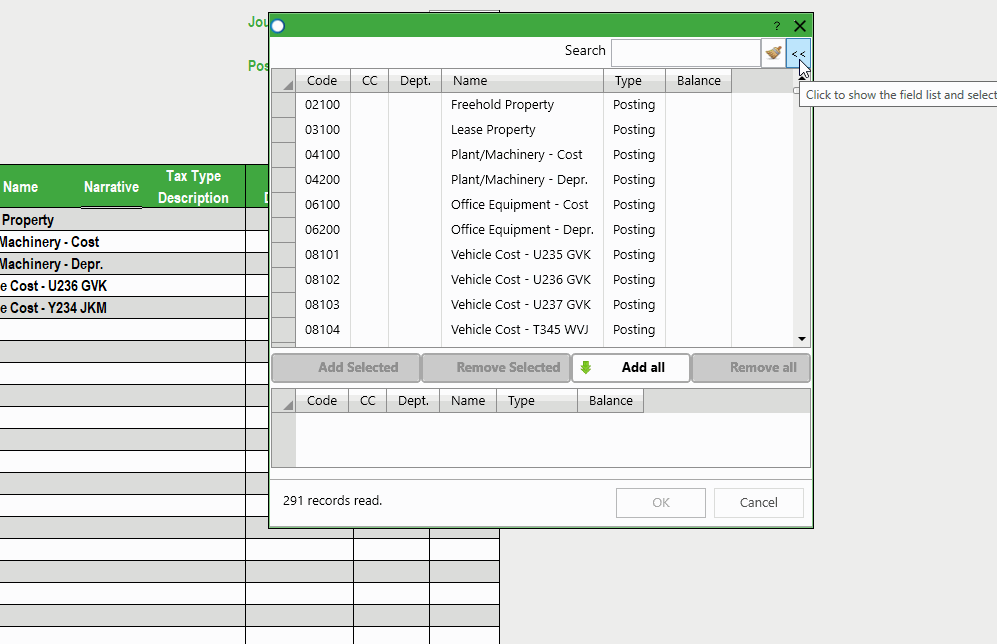
A number of browses offer the chance to select which fields are displayed in the browse and in what order they appear.
To select which fields are displayed, click on the double arrow in the top right-hand corner. (If this arrow is not there, then field selection is not available on this browse.)
Info
In general, displaying fewer fields will improve the performance but having the same fields as your template will also improve performance
To select the order in which the fields are displayed, click on the column heading and drag whilst holding down your mouse button.
Fast Entry
Fast Entry is an exciting feature that allows you to pick Sage data quickly.
Fast Entry has to be activated from your ribbon.
Once activated, you can invoke the browse just by entering the Tab button on your keyboard.
Anything entered in the cell when you enter the tab will be used in a full-text filter.
Info
If only one record matches the filter, that record will be automatically selected and the browse closed.
This video shows how to use Fast Entry.
Browse Settings
Settings for the new advanced browse are stored in %AppData%\Roaming\Codis\Excelerator\BrowseSettings.
Each browse has its own settings file. The names of the files should be sufficient to tell you which browse they relate to.